With Invoi.vn, you can issue a VAT invoice with Tax Authority’s code quickly and easily — even from your phone. This step-by-step article guides you through the entire process.
Your VAT invoice will look professional, you can send it to your customer in just one click, and you’ll have peace of mind knowing you didn’t miss anything.
Read the guide below to get started.
How to create a VAT invoice?
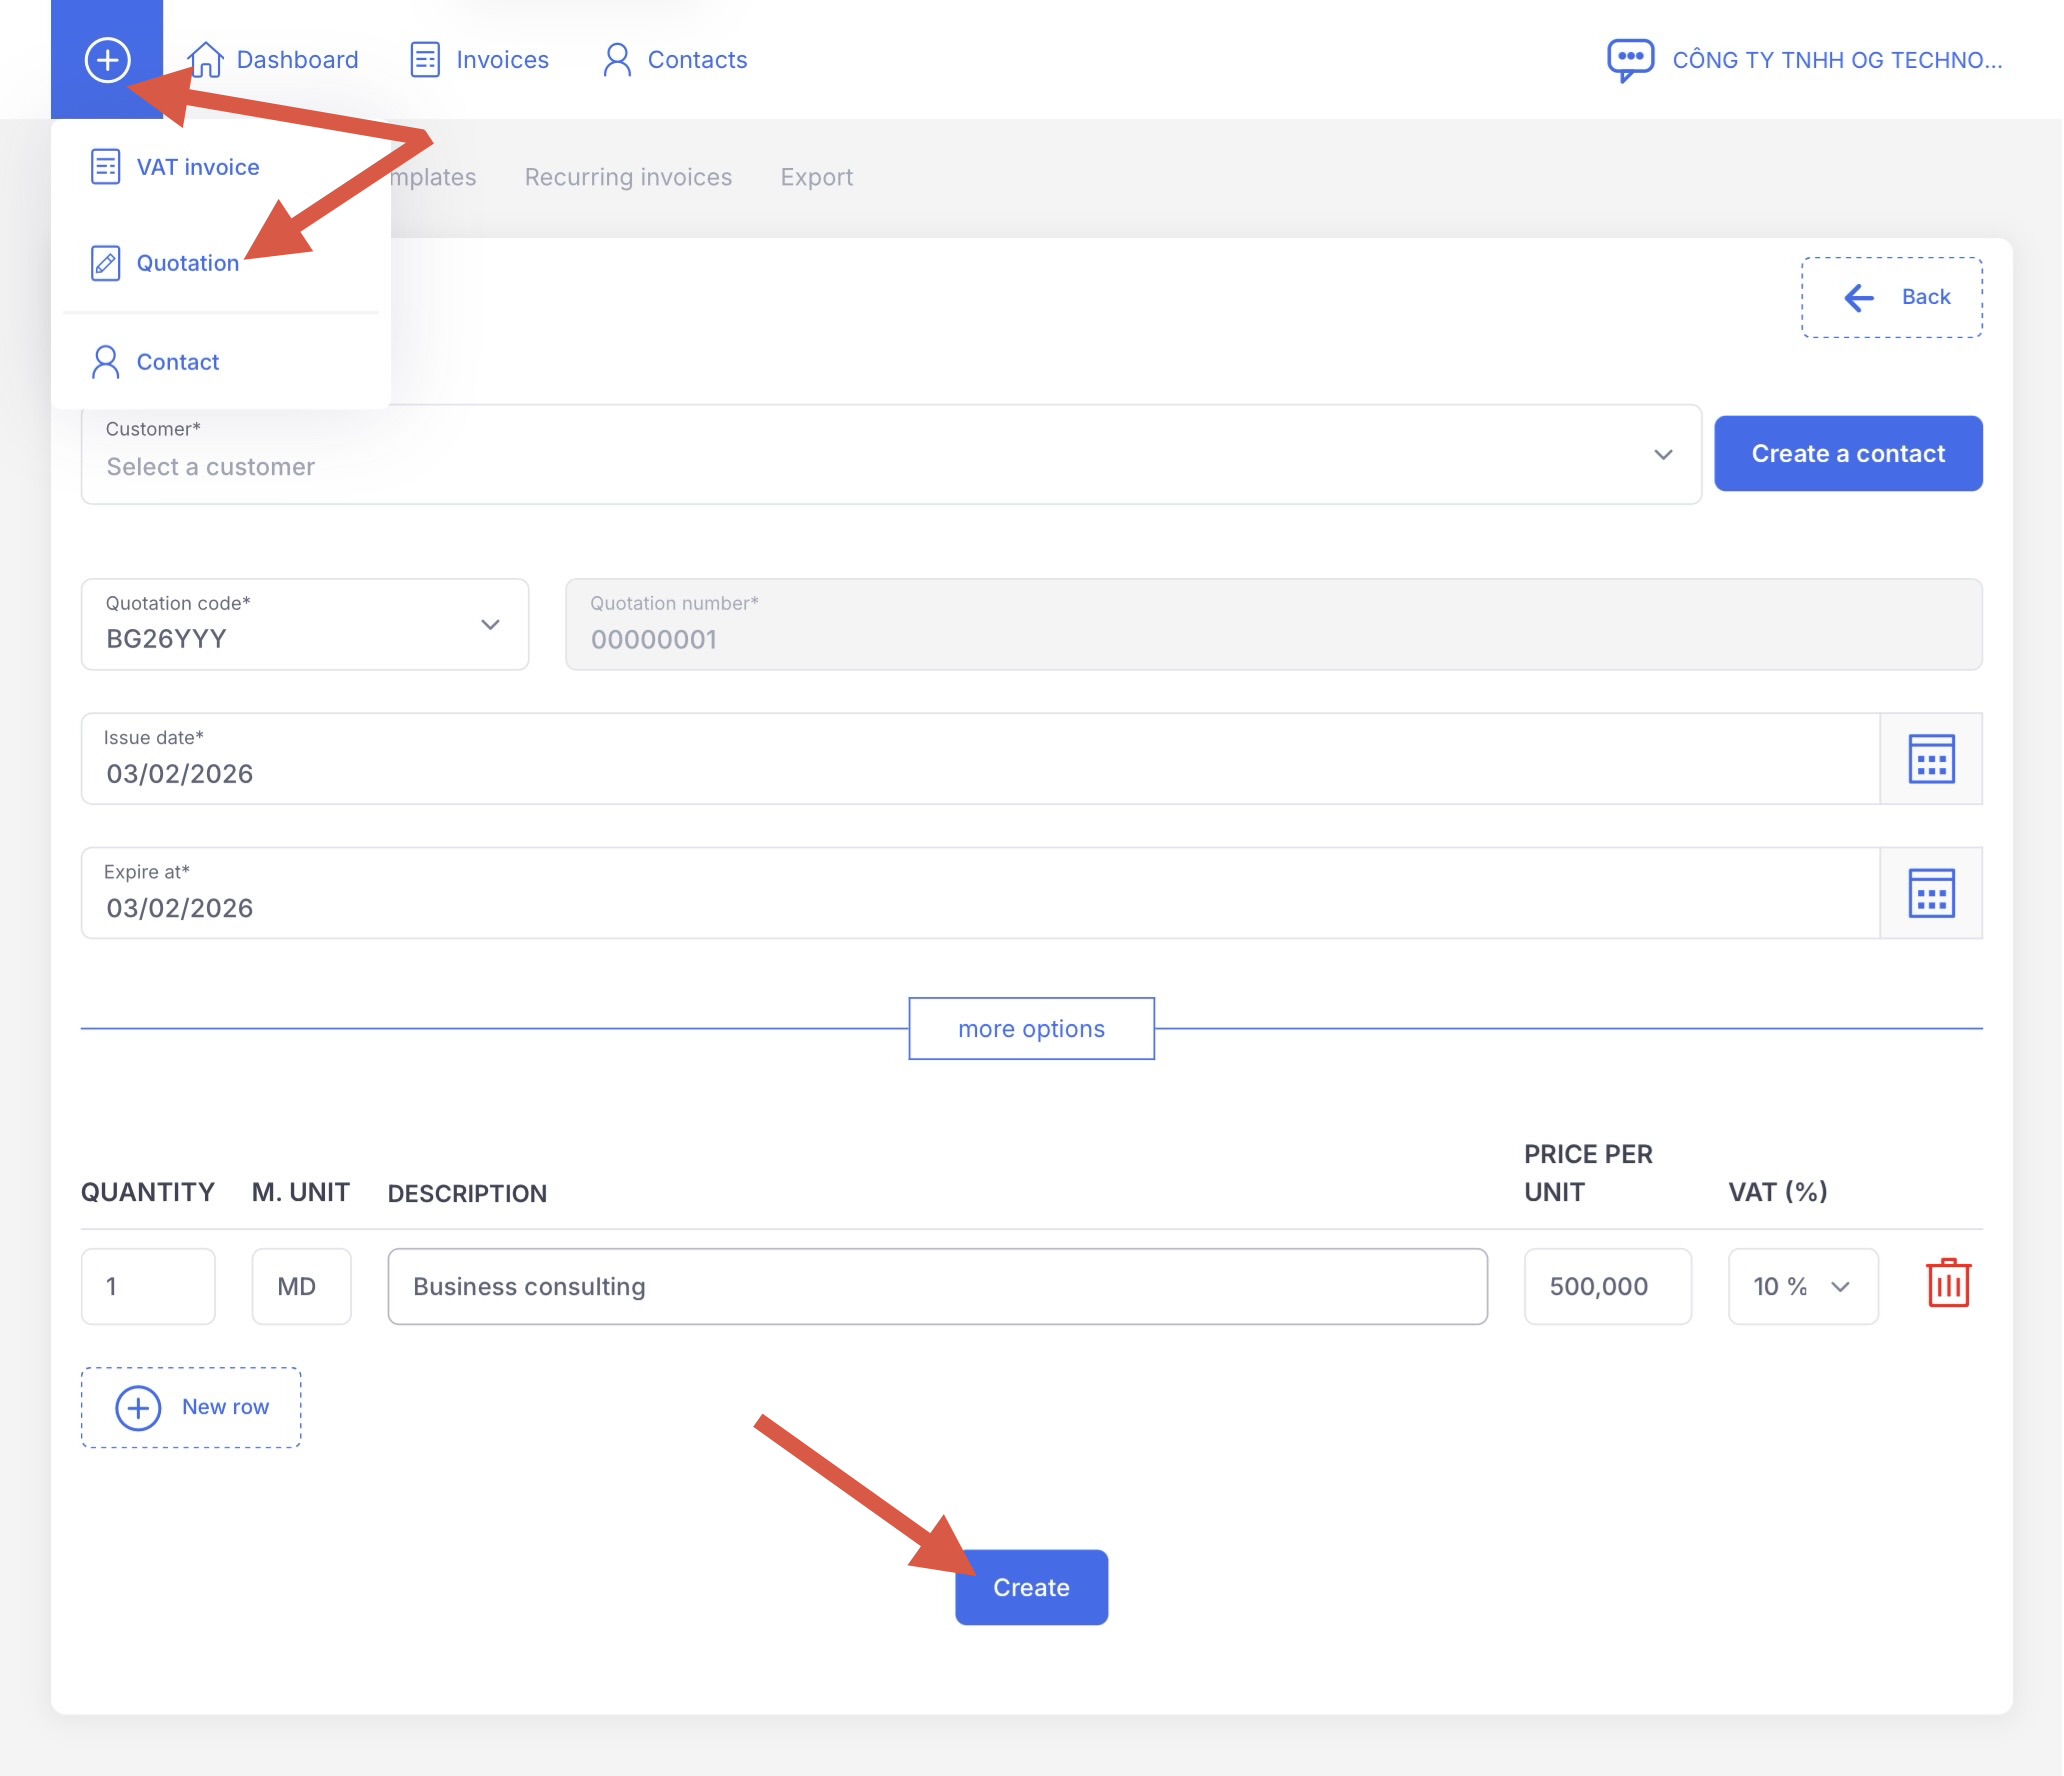
Creating a VAT invoice with Invoi.vn is simple. Just tap the blue “+” button in the main menu, and click “VAT invoice” on the dropdown menu.
After filling in the required details, finalize it by clicking the blue “Create invoice” button.
What information is required on the VAT invoice?
To successfully issue a VAT invoice, you only need to fill in these mandatory fields:
-
Customer (buyer)
-
Quantity and Item description
-
Price and VAT rate
All other details are automatically pre-filled by our robot. You can also set most default values in advance under Settings → Default values.
What can you customize on the VAT invoice?
All fields can be edited with a click or toggle. This makes it easy to adjust key settings such as the invoice series, payment method, and due date.
What other settings are available?
You can access advanced invoice settings directly within the invoice via the drop-down menu. After clicking “More options”, you can, for example: choose the invoice language, select a bank account, adjust the invoice design, change the payment reference (content), edit the footer, and more.
Basic step-by-step process to issue a VAT invoice in bullet points
-
Log in to your account
-
Click VAT invoice in the top-right corner
-
Select an existing customer or create a new one
-
Set the due date
-
Adjust the quantity
-
Enter the item/service description
-
Enter the price
-
Select VAT rate
-
Click Create invoice
-
Send the invoice by clicking Send